
Adjusting a LiftMaster garage door opener could be the solution for those having trouble with their garage door. This detailed guide offers the insights needed to make these adjustments successfully. From everyday issues to the necessary tools, this article covers everything required to ensure your garage door opener’s safe and efficient operation.
Learning how to adjust a LiftMaster garage door opener can save you time and prevent costly repairs. Whether the door fails to open smoothly or requires realignment, knowing the steps involved can keep your door functioning properly. This guide provides a step-by-step approach and emphasizes safety and maintenance, ensuring long-lasting performance.
Understanding LiftMaster Garage Door Openers
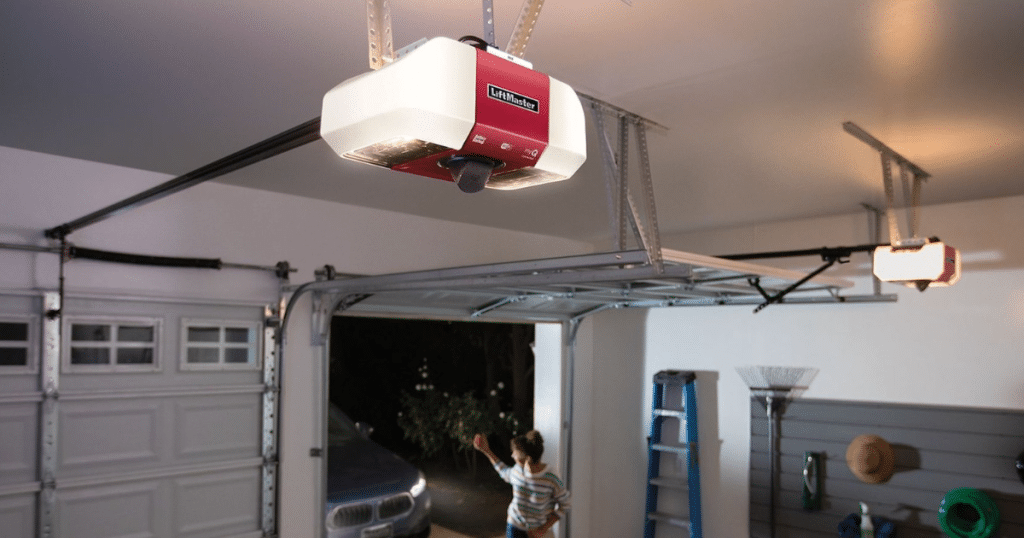
LiftMaster garage door openers are famous for their advanced technology and dependable operation. With MyQ technology, you can control your garage door through your phone. These openers improve home security and daily convenience, making them one of the most trusted options for many homeowners today.
Like any garage door opener, LiftMaster models can experience issues over time. Knowing how a garage door opener works can help with quick fixes. Important components, such as the motor, drive system, and safety sensors, each play a crucial role in determining how smoothly your garage door operates.
LiftMaster offers three types of openers: chain drive, belt drive, and screw drive. Each type has unique benefits and maintenance needs. Knowing these types helps with maintenance, fixing issues, and picking the right opener for your home.
Common Issues with LiftMaster Garage Door Openers
If your LiftMaster garage door opener is acting up, you’re not alone. Many homeowners encounter common issues that can often be resolved with simple steps.
Door Doesn’t Open or Close Fully
This problem typically indicates that the safety sensors are dirty or misaligned. It could also be caused by faulty travel limits that need to be adjusted.
Unusual Noises During Operation
Loud grinding or squeaking sounds may point to worn-out parts. It often helps to apply garage door lubricant to the tracks and hinges.
Remote Control Not Working
The remote might have dead batteries or be affected by interference from nearby electronic devices. To improve the connection, try replacing the batteries or reprogramming the remote.
Knowing these common LiftMaster garage door opener problems can save time and money. Routine maintenance is key to ensuring your garage door operates smoothly for a long time.
Tools Needed for Adjusting a LiftMaster Garage Door Opener
Before adjusting a LiftMaster garage door opener, gathering the necessary tools is essential. Having the right equipment ensures a smooth and efficient process, reducing the risk of further complications.
- Screwdrivers: Both flathead and Phillips screwdrivers are needed for various adjustments.
- Wrench Set: For tightening or loosening bolts and nuts.
- Tape Measure: To ensure accuracy in alignment and adjustment.
- Level: To check the alignment of the door and tracks.
- Ladder: For reaching high components safely.
- Lubricant: For reducing friction in moving parts.
- Multimeter: For checking electrical connections.
- Safety Glasses and Gloves: To ensure personal safety during adjustments.
These tools will make the adjustment process more manageable and efficient. It’s also wise to consult the LiftMaster manual specific to your model for any additional tools that may be required.
Step-by-Step Guide to Adjusting a LiftMaster Garage Door Opener
Adjusting a LiftMaster garage door opener requires careful attention. Use this step-by-step guide to ensure your adjustment is done correctly.
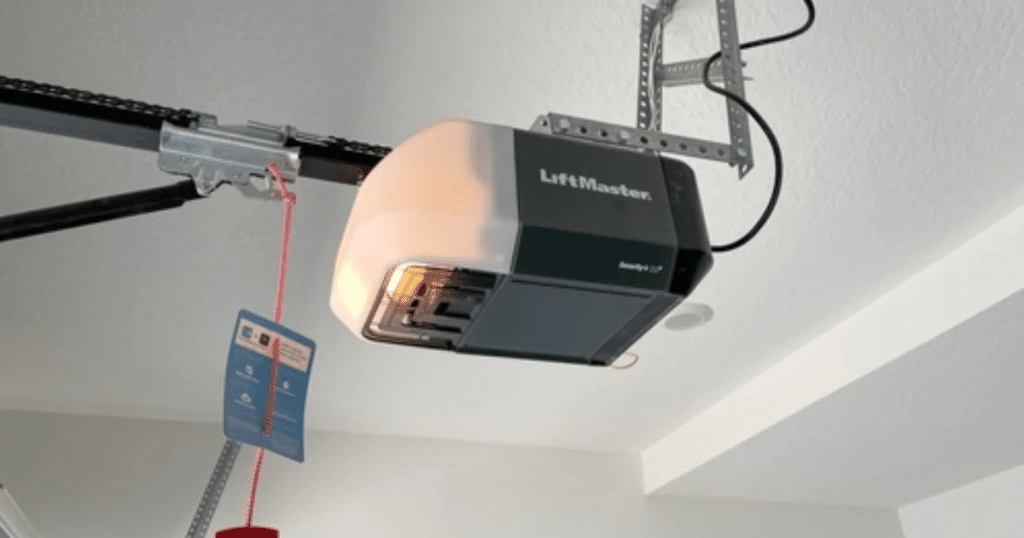
Step 1: Safety First
Ensure the garage door is closed. Unplug the opener to avoid it turning on unexpectedly during adjustments.
Step 2: Check the Door Balance
- Release the opener from the door by pulling the emergency release handle.
- Lift the door manually halfway. It should stay in place. If not, the springs may require adjustment.
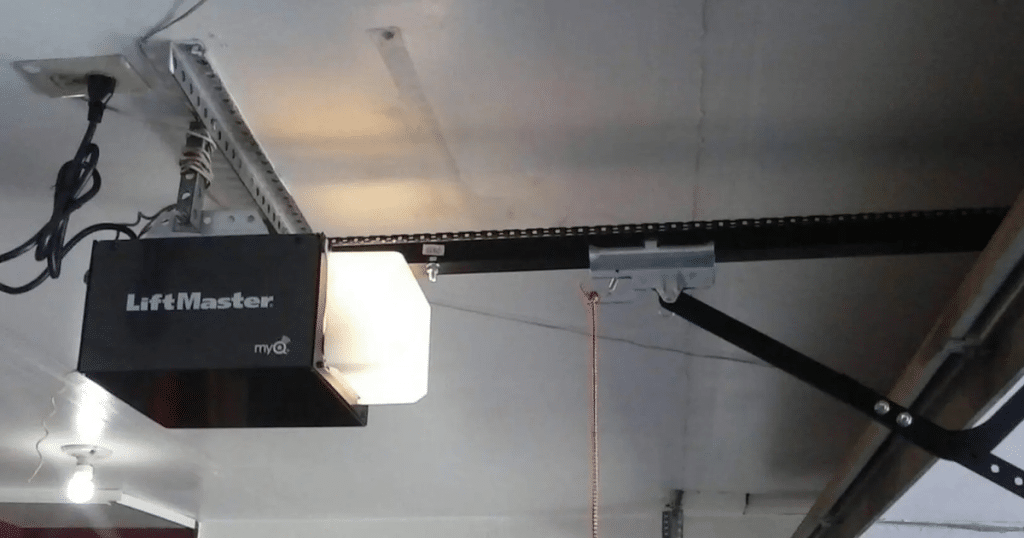
Step 3: Adjust the Travel Limits
- Find the limit adjustment screws on the garage door opener unit.
- Use a screwdriver to adjust the screws. Turn clockwise to decrease the travel distance and counterclockwise to increase it.
Step 4: Test the Safety Sensors
- Ensure the sensors are aligned and free from obstructions.
- Test the sensors by putting an object in the door’s way while it closes. If the sensors work correctly, the door will reverse automatically.
Step 5: Reconnect and Test
- Reconnect the opener to the door.
- Power up the opener and test the door’s operation. Make further adjustments if necessary.
Completing these steps guarantees your garage door opener is adjusted correctly and operates safely.
Safety Tips When Adjusting a Garage Door Opener
Putting safety first is essential when working on garage door openers. Mishandling can lead to injury or damage. Here are some crucial safety tips:
1. Disconnect Power
Always unplug your LiftMaster garage door opener before starting any repairs or adjustments to avoid electric shock or unexpected movement. Safety comes first.
2. Use Proper Lighting
Make sure your garage is well-lit so you can clearly see all parts of the opener. Low visibility increases the risk of errors and accidents.
3. Wear Safety Gear
Always wear safety glasses and work gloves to protect your eyes from dust and your hands from sharp metal edges while working on your garage door opener.
4. Avoid Loose Clothing
Avoid wearing baggy clothes, jewelry, or anything that can get caught in moving parts. This simple step helps prevent serious injuries during garage door repairs.
5. Follow the Manufacturer’s Instructions
Always read your LiftMaster owner’s manual before adjusting anything. It has model-specific safety tips and guides to help you avoid damage or injury while troubleshooting.
Taking these safety precautions helps protect you and keeps your garage door opener working well for a long time.
When to Call a Professional for LiftMaster Garage Door Issues
Not all LiftMaster garage door problems can be fixed at home. If you’re dealing with tricky electrical issues, broken springs, or worn-out cables, it’s best to call a garage door repair expert. Professionals have the right tools and skills to fix serious problems without risking injury or more damage.
If your garage door continues to malfunction even after basic adjustments, it’s time for a thorough diagnosis. Persistent malfunctions often indicate hidden issues that only trained technicians can identify. Calling a professional for LiftMaster garage door opener repair ensures safety, saves time, and helps your door last much longer.
Maintenance Tips for a LiftMaster Garage Door Opener
Regular maintenance helps your LiftMaster garage door opener last longer and work better. Follow these easy tips to keep it running smoothly and avoid costly repairs.
1. Lubricate Moving Parts
Apply garage door lubricant to rollers, hinges, and tracks every few months. This reduces friction, prevents rust, and helps your LiftMaster opener run quietly.
2. Check and Tighten Hardware
Inspect all bolts, screws, and brackets on the door and opener. Tighten anything loose to avoid shaking parts and keep your garage system stable.
3. Test Safety Features
Set a sturdy object beneath the garage door and lower it. The door should automatically reverse. If not, clean the sensors or call a technician.
Maintenance Schedule
- Monthly: Inspect the door’s balance monthly and verify that the sensors function correctly.
- Quarterly: Lubricate moving parts and inspect the tracks.
- Annually: Perform a comprehensive inspection or hire a professional for a thorough check-up.
Consistent maintenance ensures the smooth operation of your garage door opener and prevents unexpected failures.
FAQs About Adjusting a LiftMaster Garage Door Opener
How do I program travel limits on my LiftMaster opener?
To program travel limits on your LiftMaster opener, press the adjustment button until the up arrow blinks. Use the arrows to set the open and close positions, then press again to save. Always consult your LiftMaster model’s manual before adjusting.
Why won’t my LiftMaster close all the way?
If your LiftMaster won’t close completely, the safety sensors could be dirty, obstructed, or out of alignment. Clean them and check alignment. Additionally, check that the door’s path is clear of any obstacles. These small fixes often solve LiftMaster garage door closing problems.
What do the blinking lights mean during adjustment?
Blinking lights during LiftMaster adjustments typically indicate issues with travel force settings or sensor problems. Keep track of the number of flashes and refer to your LiftMaster manual to identify the specific error code. This helps with fast and accurate garage door troubleshooting.
When is sensor alignment causing force learning problems?
Sensor alignment issues can cause LiftMaster force learning errors when the sensors don’t face each other properly. The system may stop or reverse if it can’t detect a clear path. Correct the sensor positioning so that both indicator lights stay steady.
Where are the travel adjustment screws located?
The travel adjustment screws on a LiftMaster opener are usually found on the side or back of the motor unit. These screws control the distance of the door’s movement. Turn them slowly, test the door, and adjust to set the correct open and close positions.
Conclusion
If your garage door isn’t working right, it might be time to look closer. Knowing the basics of adjusting a LiftMaster garage door opener can help you resolve minor issues before they escalate into more significant problems. It’s a simple way to keep your garage running smoothly.
But sometimes, adjustments aren’t enough. If your door still struggles to open or close, or the opener makes strange sounds, calling a professional is the smart choice. Some problems require expert tools and training, especially when safety is at risk with springs, cables, or sensors.
At Brother’s Garage Doors, we’re always here to help. Whether you’re maintaining your system or need complete garage door repair in Livonia, MI, our team has your back. Don’t wait for things to get worse. Let us help you get your LiftMaster opener working like new again.
End Note
At Brother’s Garage Doors, we help homeowners with adjusting a LiftMaster garage door opener and other garage door needs. Our skilled team provides garage door repair, replacement, and opener services to ensure your system works perfectly. We also handle broken garage door springs with the tools and skills to do the job correctly.
If your garage door suddenly stops working, you can rely on our emergency services to resolve the issue promptly. We proudly serve many local areas, which you can view on our service areas page. To explore everything we offer, visit our services page, read helpful tips on our blog posts, or learn about our team on the About Us page.
When you are ready to get started, reach out through our Contact Us page for fast help and friendly service. We take pride in being a reliable option for garage door repair in Livonia, MI. You can also see what our happy customers say on Facebook and Yelp. Let Brother’s Garage Doors take care of your home with the quality you can trust.
Brothers Garage Door Service
29522 Wentworth St, Livonia, MI 48154, United States
+17342920971