

Have you ever wondered, “How do you adjust a garage door opener?” You’re not alone in facing noisy, slow, or unreliable garage doors. These issues often come from misaligned settings or worn components. A simple adjustment can restore smooth operation. It improves everyday convenience, enhances home security, and helps your garage door opener work longer without major repairs.
It likely needs an adjustment when your garage door jerks, reverses for no reason, or fails to shut completely. Making small changes can prevent breakdowns and save on costly service calls. This guide explains everything you need to know about adjusting your opener correctly. Keep reading to learn the safest and easiest steps for better performance.

Understanding Garage Door Openers
Garage door openers use a motorized system that moves the door along a track to open and close it automatically. The garage opener system comprises key components, including the motor, rail, trolley, and sensors. Knowing how garage door openers work helps you understand when something needs to be fixed or adjusted.
Modern garage door openers have additional features, including smart home controls, rolling code security, and battery backup. Still, their main job is to move your door up and down safely. Whether your system is basic or smart, it relies on the same core opener parts to function smoothly.
Learning how your garage door opener works gives you confidence when problems arise. A little knowledge goes a long way in determining if the garage door motor starts acting up or if the remote stops responding. You will be better prepared to troubleshoot and adjust your garage opener system.
Common Signs Your Garage Door Opener Needs Adjustment
Recognizing the signs that your garage door opener needs adjustment is crucial in maintaining its efficiency. One common indication is if the door does not open or close fully. This issue can stem from misaligned travel limit settings or obstructions in the track.
Another sign is if the door reverses direction unexpectedly during operation. This could be due to improperly set force settings or obstacles that the safety sensors detect. Additionally, if your door makes unusual noises or moves jerkily, it may require fine-tuning to prevent further mechanical issues.
Lastly, if you notice a delay in response when using the remote control or wall switch, it may indicate the need for adjustment. Addressing these signs promptly can prevent bigger problems and ensure your garage door opener functions reliably.
Tools You Will Need for Adjusting a Garage Door Opener
Having the right tools on hand is essential for accurately adjusting your garage door opener.
- Screwdriver Set: Essential for tightening or loosening screws on the opener and its components.
- Wrench Set: Useful for adjusting bolts on the track or opener unit.
- Ladder: Provides access to the overhead parts of the garage door opener.
- Level: Ensures that the tracks and door are aligned correctly.
- Tape Measure: Helps in measuring distance for travel limit settings.
Before starting the adjustment process, gather these tools to make the task efficient and hassle-free. Having them ready ensures you can handle any adjustment aspect without unnecessary interruptions.
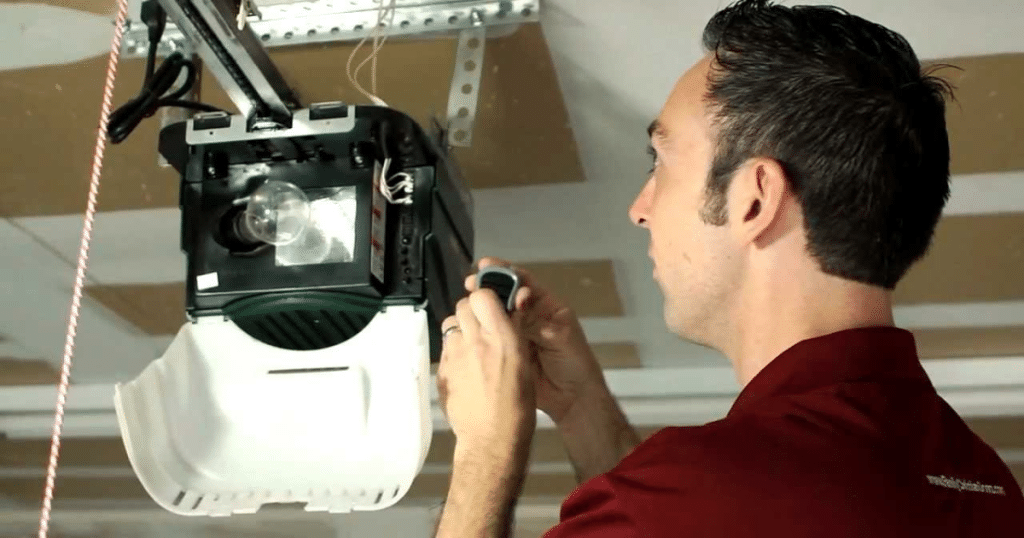
Step-by-Step Guide: How Do You Adjust a Garage Door Opener?
Adjusting your garage door opener might sound tricky, but it’s actually easier. With a few careful steps, you can fix common problems and make your garage door run better.
Step 1: Disconnect the Power
First, turn off the garage door opener power for safety. Unplug the unit or turn off the circuit breaker to keep everything safe while working, especially if you’re adjusting sensitive garage opener parts.
Step 2: Identify the Adjustment Screws
Find the screws labeled for travel limits and force adjustments. These are usually on the side or back of the garage door motor and control how far and how hard your door moves.
Step 3: Adjust Travel Limits
Use a flathead screwdriver to turn the travel screws slightly. One controls how far the door opens, and the other controls how far it closes. Make small changes and test often.
Step 4: Fine-Tune the Force Settings
If your door reverses too early or feels too stiff, adjust the force settings. This controls how much force the opener uses, helping prevent damage and keeping the operation smooth.
Step 5: Reconnect Power and Test
Plug the opener back in or flip the breaker switch. Press the wall button or the remote to test how the door opens and closes. If the door continues to act up, redo the process.
Learning how to adjust a garage door opener can prevent costly repairs and frustrating breakdowns. By following these simple steps, your garage door will run safely, smoothly, and reliably every day.
How to Adjust Travel Limits on a Garage Door Opener
Travel limit settings control how far your garage door opens or closes. If set wrong, the door may stop early or not close fully. Here’s how:
1. Locate the Travel Limit Screws
Find the travel limit screws on the side or rear of the motor unit. These settings manage the full range of your garage door’s opening and closing movements.
2. Adjust the Close Limit
Turn the close limit screw clockwise to shorten closing distance. Adjust slowly until the door shuts completely without reversing or leaving a gap at the bottom.
3. Adjust the Open Limit
Use a flathead screwdriver to turn the open limit screw. Make small changes until your garage door opens fully without hitting the stop bolt or jerking.
Test the garage door after adjusting to ensure smooth opening and closing. Proper travel limits help the door run efficiently without straining the opener.
How to Adjust Garage Door Opener Force Settings
Force settings control how much power your garage door opener uses to lift and lower the door. If set wrong, the door might stop or reverse. Here’s how to adjust them.
1. Locate the Force Adjustment Knobs
Look for the force adjustment knobs on the back or side of the garage door opener motor. They control how much power moves the door.
2. Adjust the Closing Force
If your garage door struggles to close or reverses midway, increase the closing force slightly. Avoid setting it too high to maintain safety.
3. Adjust the Opening Force
If the door stalls or moves unevenly, slightly raise the opening force. Small tweaks help it move smoothly without overworking the garage door motor.
Testing the door after each adjustment ensures optimal force settings, preventing damage to the door and ensuring safety during operation.
Testing Your Garage Door Opener After Adjustment
Testing your garage door opener after making adjustments is an important step you should never skip. It confirms your opener is working safely and the door is moving correctly.
1. Operate the Door Using the Remote
Use the remote to run the garage door through a complete open and close cycle. Watch closely to ensure smooth movement without jerking, delays, or stopping partway through the operation.
2. Test the Safety Reversal
Set a small item under the door, like a paper towel roll. As the door closes, it should reverse immediately upon contacting the object.
3. Listen for Unusual Noises
Run the garage door several times and listen for grinding, squeaks, or rattles. Strange sounds could signal that more adjustments or garage door maintenance are needed.
Testing helps confirm that your garage door opener adjustment was successful. It ensures smooth function, boosts safety, and prevents future issues with your garage door system.
Troubleshooting Issues During Adjustment
During adjustment, you may encounter some common issues. Having troubleshooting tips handy can resolve these problems swiftly:
- Door Doesn’t Open Fully: Recheck the open limit settings and adjust as necessary.
- Door Reverses Before Closing: Inspect the safety sensors for alignment and ensure the close force is set correctly.
- Unusual Noises Persist: Lubricate the tracks and rollers, and check for any loose components.
Addressing these troubleshooting steps can resolve common issues and ensure your garage door opener operates smoothly.
When You Should Hire a Pro to Fix Your Garage Door Opener
Sometimes, fixing your garage door opener is best left to the professionals. If the motor makes strange noises or stops working, a technician can safely fix it. Electrical problems, broken sensors, or wiring issues should be handled by experts trained in garage door repair to avoid more damage or safety risks.
Calling a professional helps keep your garage door opener working smoothly and safely. Routine inspections and tune-ups catch problems early and extend the life of your system. A trusted garage door repair service can save you time and stress if you’re unsure about what’s wrong or want to avoid DIY mistakes.
Frequently Asked Questions
Is it safe to adjust a garage door opener by myself?
Yes, it’s generally safe to adjust a garage door opener if you follow instructions carefully and take safety steps like cutting power first. However, it’s best to call a pro if the issue involves springs or wiring.
How do I make my garage door close tightly?
To make the garage door close tighter, adjust the close travel limit screw on your garage door opener until it seals fully at the bottom. Always test after adjusting to ensure it doesn’t press too hard on the ground.
Why is my garage door reversing before it hits the floor?
If your garage door reverses before closing, the down force setting on the garage door opener may be too low. Adjusting this setting can help the door close fully without reversing too soon.
What should I do if my garage door opens too far?
When your garage door opens too far, turn the open limit screw on your garage door opener to reduce the height. This helps protect the door from damage and keeps it working smoothly.
How do I adjust the chain tension on my garage door opener?
To adjust chain tension, locate the tension bolt on your garage door opener’s chain rail and turn it slightly until the chain has about half an inch of slack. Avoid overtightening, which can strain the motor or wear out the system.
Conclusion
If you’ve been wondering how to adjust a garage door opener, now you know it’s easier than it seems with the right steps. A smooth-running garage door starts with proper adjustments and regular care. These simple steps can help you avoid future problems and make your garage door opener last longer.
Still having trouble? Sometimes, the issue needs more than a simple tweak. If you live nearby, professional garage door repair in Livonia, MI, from Brother’s Garage Doors can make all the difference. Our skilled team knows exactly how to handle stubborn openers and complex problems with care and precision.
Don’t let garage door problems pile up. Take action now by scheduling a service with Brother’s Garage Doors. We’ve got you covered from quick tune-ups to complete garage door repair in Livonia, MI. Contact us today to keep your garage door working like new.
End Note
Looking for a simple way to adjust your garage door opener at home, but don’t want to risk doing it wrong? Brother’s Garage Doors is here to help. Count on our local team to handle garage door problems with reliable service that keeps your door running smoothly and stress-free. Visit our complete list of garage door services to see how we can help today.
Whether you need help with broken springs, garage door repairs, replacements, or openers, our team is ready to handle it all for you. We also fix garage door panels, garage door cables, and install steel sectional doors. Need help right away? Our garage door emergency service is just a call away, day or night.
Learn more about our service areas, read our About Us story, or check out helpful tips on our blog posts. Want real reviews? Visit us on Facebook or see ratings on Yelp. Ready to talk? Contact us today and schedule the garage door service you can count on.
Brothers Garage Door Service
29522 Wentworth St, Livonia, MI 48154, United States
+17342920971