
Changing a garage door panel may appear challenging, but with the proper tools and expertise, it can be completed effectively. If you’ve been wondering how to change a garage door panel, you’re in the right place. This guide walks you through the process step by step, ensuring you can replace your garage door panel safely and correctly.
Garage doors are essential for protecting your home, so maintaining them is crucial to their proper functioning. Panels can become damaged or worn over time due to impacts or exposure to the elements. Learning how to replace a garage door panel can help you save time and money. This guide will provide you with everything you need to know to replace a garage door panel like a professional.
Garage doors are composed of multiple panels connected by hinges, enabling smooth movement along the track. Panels come in various materials such as steel, wood, and aluminum, offering different durability, insulation, and aesthetic options. Replacing damaged panels promptly is key to maintaining your door’s functionality.
Each garage door panel is designed to fit specific door styles and models. Choosing the right replacement panel ensures compatibility and proper functioning. Understanding the materials and types of panels available will help you make the best decision, leading to a successful repair that lasts.
Replacing a garage door panel requires some key tools and materials to ensure the job is done correctly.
Having these tools ready will ensure a smoother process and reduce the chances of mistakes during the replacement.
Before starting any garage door repair, safety should always be your top priority. Garage doors are bulky, and mishandling them can result in injury. Here are key safety precautions to keep in mind:
It’s essential to disconnect the garage door opener before beginning any repairs. This ensures no accidental activation, preventing injury or damage while you’re working on the door.
Always wear gloves, goggles, and closed-toe shoes to protect yourself. This gear helps prevent injuries from sharp edges, debris, and unexpected accidents during repairs.
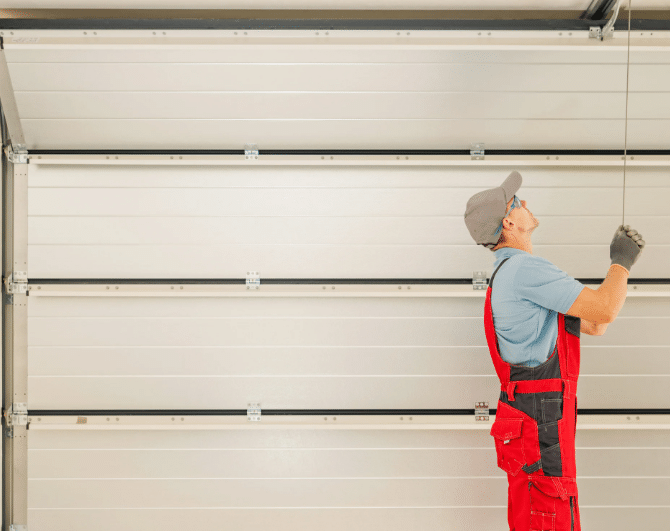
If your garage door has spring-loaded mechanisms, support it properly. These springs hold significant tension and can cause serious injuries if released without caution or proper handling.
Having the proper tools is crucial to completing the job successfully. This helps avoid unnecessary damage, makes the process smoother, and ensures you’re working safely while repairing your garage door.
Taking these precautions will protect you during the entire panel replacement process, ensuring the task is done safely.
Replacing a garage door panel can seem tricky, but with the right approach, it’s manageable. This guide will take you through each step of the process for a smooth and successful repair.
Disconnect the power to the opener and, if spring-loaded, carefully release the tension. Use a ladder for support while working on the door.
Use a wrench and a screwdriver to loosen the bolts securing the panel. If necessary, carefully pry the panel off the track.
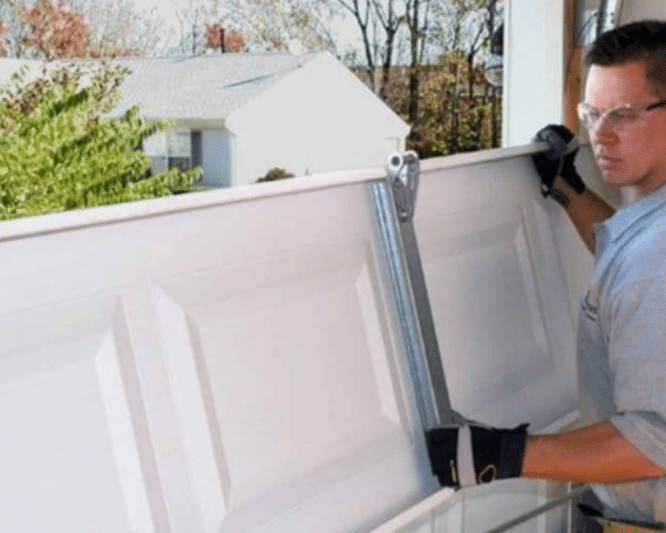
Align the new panel where the old one was. Ensure the hinges are aligned correctly and fasten the panel in place using bolts and screws.
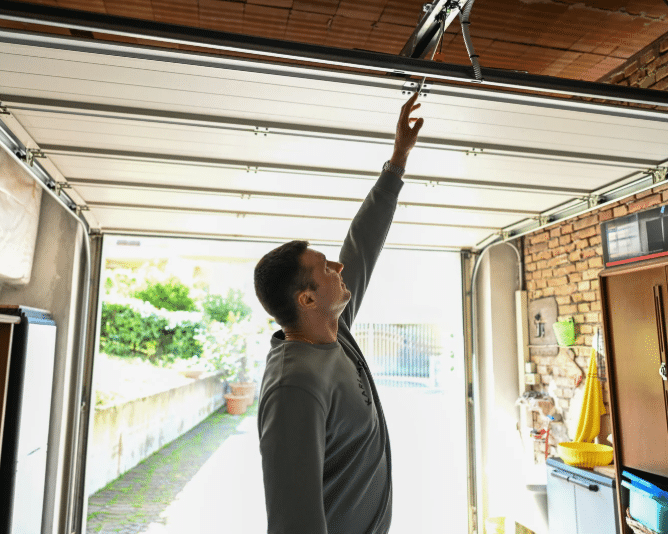
Reattach the tracks, springs, and other components. Verify the alignment once more before tightening the bolts to make sure everything is positioned correctly.
Test the door by opening and closing it. Listen for unusual sounds or jerky movements that may indicate an issue with the installation.
By carefully following these steps, you will learn how to change a garage door panel and get your door back in top shape.
Changing a garage door panel can sometimes come with its own set of challenges. Below are some typical problems you may face and how to address them:
Tackling these problems early helps prevent additional issues and ensures your garage door functions properly.
After installing the new garage door panel, regular maintenance is essential to prolong the lifespan of your garage door. Regular maintenance will keep your panels in good condition and prevent the need for frequent repairs. Here are some tips to follow:
Lubricate the rollers, hinges, and tracks to reduce friction, prevent wear, and ensure smooth, quiet operation of your garage door.
Check your garage door regularly for signs of wear or damage, especially after storms, to avoid costly repairs and maintain its safety.
Clean your garage door panels to remove dirt and debris, preventing damage, improving appearance, and extending the door’s lifespan.
Periodically test the door’s balance and adjust if needed to prevent strain on the panels and ensure smooth operation.
By following these maintenance tips, you’ll keep your garage door panels looking great and functioning properly for years.
While changing a garage door panel can be a DIY project, there are times when it’s better to call a professional. Here are some situations where it’s best to seek professional help:
A skilled garage door technician can manage intricate garage door repairs and guarantee the job is completed correctly from the start.